
1. Download PnP-Starter-Kit from the GitHub.


3. Set Release preferences to : Targeted release for everyone. You may get the following error. If you missed to change the setting.


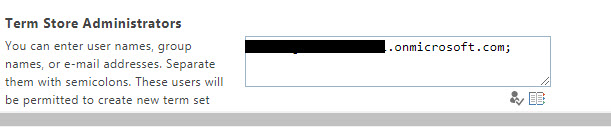
4. Navigate to https://<tenant> -admin.sharepoint.com/_layouts/15/termstoremanager.aspx term store management page.
5. Add Term store administrator set as "tenant admin" and Save the settings.
6. It will take 24 hours to save your tenant preferences.
7. Go to the sp-stater-kit download location.
8. You will find the list of folders and let me explain you the folder one by one.
- Assists: store all the image and these images being used inside the provisioning scripts files.
- documents : Provide the steps how to add the app in app store and how to manage the 3rd party API using API management page. How to add/create new people property in the user profile.
- Package : contains the "sharepoint-starter-kit.sppkg" package file.
- Provisioning: Folder contains all the JSON, XML and PowerShell Script. This is main folder that being used in the deployment process.
- Sample-lob-service: This is just an example of the azure project that you can use as the reference to create the service and deploy and deploy in azure.
- Solution: This folder contains all the SharePoint Framework web parts and extensions that being used in this project.
- collab.xml: This is template file and being used for sub sites Marketing and Human Resource site for apply the application customizer web part
- collabcommunicationsite.json : Portal application customizer to set the footer links.
- collabteamsite.json: Collaboration application customizer for shared links.
- deploy.ps1 : deploy the template to your sharepoint tenant.
- deployvsts.ps1 : Call the deploy.ps1 and pass some default parameters.
- functions.ps1: Helper functions that include in the deploy.ps1 file.
- hierarchy.json : The hierarchy specified in the JSON file.
- PnP-PortalFooter-Links.xml: The template that contains the data types and other information about the site.
- PnPSPPortalShowCase.json: No idea about this file.
- portal.xml: Portal template
- readme.md: Information steps to help individual to install the PNP starter kit.
- solution.xml : deploy WebApiPermission to the tenant for Graph permission.
10. Start deploy the solution.


- Create the Custom user profile property https://github.com/SharePoint/sp-starter-kit/blob/master/documentation/tenant-settings.md
- Upload the " sharepoint-starter-kit.sppkg " app catalog. https://github.com/SharePoint/sp-starter-kit/blob/master/documentation/manual-deploy-sppkg-solution.md
- Provide the access to the Graph Service. https://github.com/SharePoint/sp-starter-kit/blob/master/documentation/api-management.md
- Install the PNP Online latest powershell dependency to connect to the tenant and deploy the package.
- Open PMP Office 365 Online Power Shell.
- Connect to the tenant using PNP PowerShell enter username and password.
- Connect-PnPOnline https://contosodemosk.sharepoint.com
- Set the current working directory to provisioning folder and run the following script.
- .\deploy.ps1 -TenantUrl https://contosodemosk.sharepoint.com -SitePrefix demo

After you complete the execution of the script. You may get the above output of the screen.
- Portal Site Layout

- Team Site Layout

Comments
Post a Comment