
Overview: This post helps to implement the Telerik controls in SharePoint 2010. At the end of this post you will find the source code.
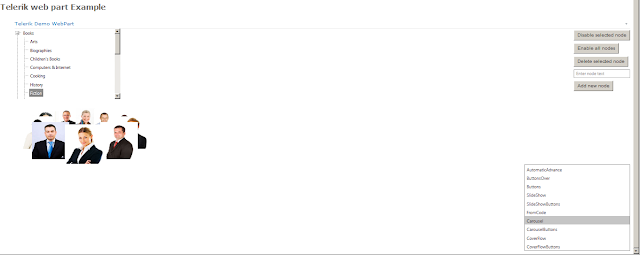
This example contains the two Telerik controls
To Implement the Telerik in SharePoint 2010. Follows the below steps
This example contains the two Telerik controls
- Treeview [Code snippets taken from the official Telerik site]
- Rotator [Code snippets taken from the official Telerik site]

To Implement the Telerik in SharePoint 2010. Follows the below steps
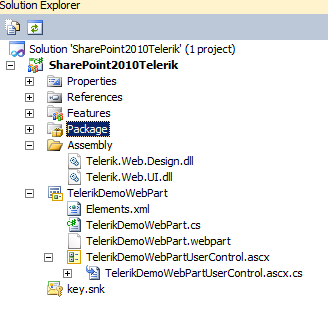
- Create [Empty SharePoint Project] and give solution name [SharePoint2010Telerik].
- Create folder in the solution [Assembly]. Copy two dll [Telerik.web.design.dll] and [Telerik.web.UI.dll] (You can download two dlls from telerik official site or The sample code at the end of this post also contains the same files)
- Add above two dll inside the package. From the solution explorer double click to the package.package icon inside package folder.
- Scroll to down click to the [advanced] button. The Additional assemble windows open click Add button the drop menu comes click [Add Existing Assembly…].


- [Add existing assembly] windows open. Click to the browse button to add telerik dlls in the package. The locations of the DLLS showed in step 2.


- Right click to project from the solution explorer. Click Add-> Add New Items. Select visual web part and give it name “TelerikDemoWebPart”.
- Register the telerik Assembly in Web part page as shows in the image.

- Now you able to work on the telerik controls.
- For more information about the code you can check the telerik documentation and tutorials official site.


Please let me know your comments about this post.
Comments
Post a Comment